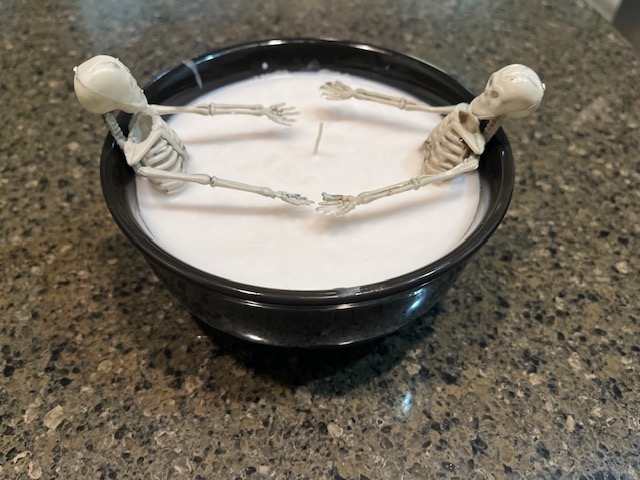
Have you wanted to make a craft and thought it would be more difficult than it was? I was nervous about creating this dollar store skeleton candle but it was super easy!
This easy dollar-store skeleton candle was made in less than an hour and I let it sit overnight to solidify. I used unscented candles but you can always add some essential oils to the melted wax to make it smell better. This is going to be for decoration only so I wasn’t worried about the scent.
I had gotten all the items I’d need for the craft from the Dollar Tree which cost less than $7 for the whole craft. I picked out a black bowl, 3 candles, and a string of skeletons. You’ll have to cut off the string from the skeletons and remove the stickers from the bottom of the candles. I used 2 skeletons and bent the arms up so they wouldn’t be submerged in the wax. However, I realized 2 candles wouldn’t be enough so I ran out and grabbed another.
Let’s get started!

First, I put the candles in a pot of hot water and waited for the wax to melt. Now, I saw this in many videos and pages and people seem to have it work well for them. It took almost an hour just for the wax in the water to melt! The top was still solid. I didn’t have that kind of time! I went on Google to try and find out a quicker way to melt the wax. Turns out that you can put the candles in the oven! I preheated the oven to 300 degrees and put the candles on a cookie sheet for 15-20 minutes and they were fully melted!! It was so much faster!
**You will want to make sure you use a hot pad or oven mitts to handle the hot glass of the candle!**

While the candles are in the oven, I use 2 rubber bands to stretch around the top and bottom of the bowl on 2 sides. This was how I would hold the skeletons in place when the wax was melted. Once I had my skeletons placed and secured, I pulled out the wick from one of the melted candles and placed that in the bottom of the bowl to harden and secure the wick. I laid a pencil across the top of the bowl and wrapped the extra wick around that to hold it upright.
Think about adding a fall scent to make it more seasonal.
If you want to add a scent to your wax then I would suggest doing it before you put it in the bowl. It will be more difficult to mix together with the skeletons and wick in the way. Check out this table with some options of fall essential oil blends to try!

I used a hot pad to hold the candle and started pouring in the wax. I recommend doing it slowly so the wax doesn’t splash out and onto the counter. Now it was time to let it sit to harden. I let mine sit overnight and it was completely solid when I woke the following morning. In the morning, I removed the pencil holding from the wick and trimmed the wick down then removed the rubber bands.

It turned out great!
This was an easy dollar-store skeleton candle that didn’t take a lot of time. Especially once I figured out how to melt the candles quickly. I love how it turned out and now it is a great piece of Halloween decor and gets loads of compliments on. My little guy laughs at it and says it looks like they are in a bath! It went right into our spare bathroom to add some seasonal decor to it!
Check out previous posts here. If you try this craft or would like to see more, leave a comment below and subscribe to my page! I’ll send you emails each time I try something new!

